Best time of year to plant trees
While trees can be planted all year round, ideally they should be planted in the winter after they have dropped their leaves, and before they began to bud in spring. This will give them a chance to get established early in the season as it will put on the most growth, of both roots and foliage, during the spring.
Steps to planting your tree
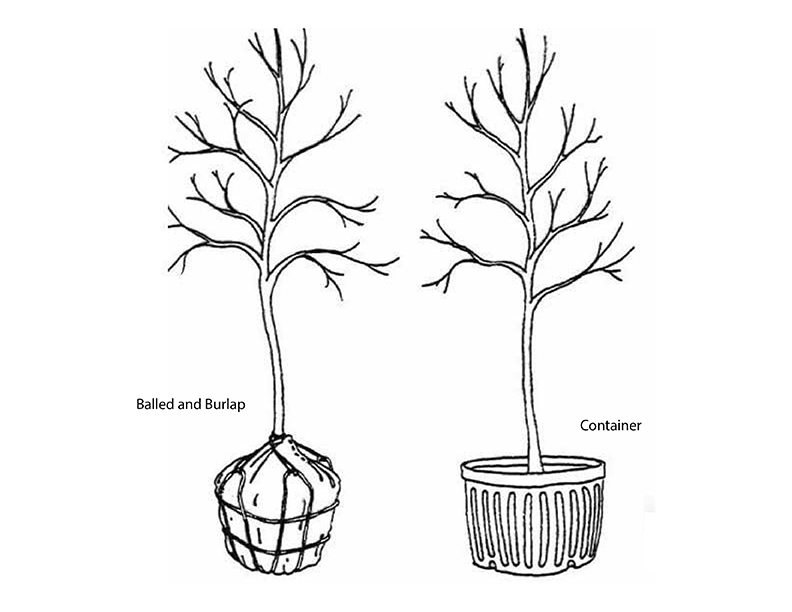
Trees are generally purchased in containers, in balled burlap (Burlap is balled around the root of a tree dug from the ground), or bare root. Generally speaking the tree you choose will be one of the first two, if you have purchased a bare root tree be sure and request instructions for care and planting with your tree as timing is important. The following steps are for planting container or balled in burlap trees.
Step 1
Locate any underground utilities, power line, gas, water, septic, etc. before selecting the site for your tree. When choosing a site, take into consideration the conditions which are ideal for the type of tree you are planting. For example, how much sunlight the tree requires, how wet or dry the site is and the type of soil. Once you have chosen the ideal home for your new tree continue to step 2.
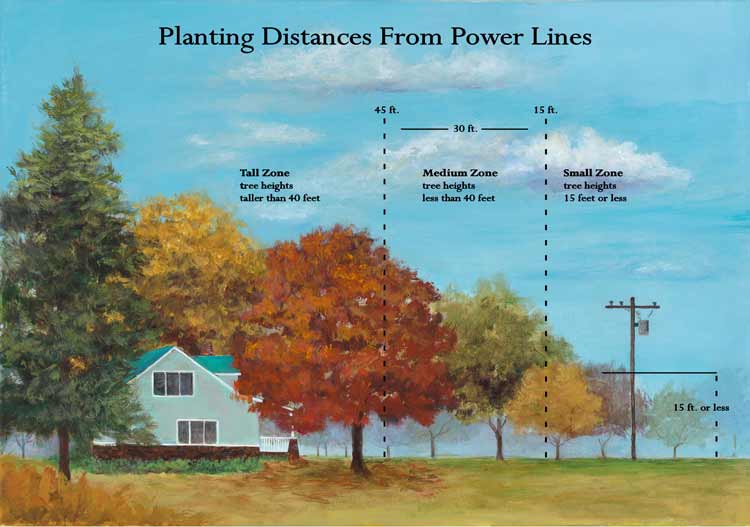
Planting Distance Guide
Step 2
Dig a wide shallow hole, roughly 3 times the diameter and slightly shorter than that of the trees root ball. When placed in the hole, the tree should have plenty of room around itself to easily expand its roots into, and sit slightly (2 to 3 inches) above the soil so that it the roots will get enough oxygen and will not suffocate.
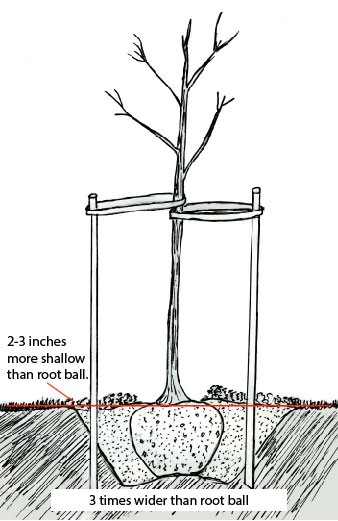
Digging the hole for your new tree.
Step 3
For container trees; carefully remove the container from the root ball of the tree. If roots have grown through the container and it cannot slip out from around the root ball, you will need to cut it off. If necessary, prune any roots extending out of the container to keep root damage to a minimum. For balled in burlap trees; DO NOT remove the burlap or the metal basket if there is one. Leave everything as is.
Place the tree in the hole and maneuver it until the tree is upright. Check from different angles, add fill dirt if necessary to get the tree completely straight. Be sure that the top of the tree’s root ball is above the soil level by a few inches. Once you are satisfied backfill the hole enough to secure the tree, gently tamping down the soil as you go, taking care that the tree remains straight.
Step 4
For Balled in burlap trees; cut any string or twine away from around the base of the truck and widen the burlap enough that there is space between it and the tree. It is not necessary to remove all of the twines, only remove what is around the trunk. As the tree grows, its roots will easily grow through any metal baskets or string, and the burlap will biodegrade into the soil, but the trunk will grow into anything that is left around it, this could weaken the tree structurally as it grows and causes it to become weak, shortening its life. Be sure that the trunk is allowed to expand unobstructed.
Continue to backfill the hole, building the soil slightly upward towards the top of the root ball, that will remain a few inches above the ground level. Keep the soil firm by tamping it down gently as you go.
Step 5
Stake the tree from 3 sides if necessary. If the tree is located in a high wind area or an area that may remain wet for an extended period of time, staking will help the tree to remain straight and secure while establishing its root system.
Step 6
Water the tree slowly, allowing the water to seep deep into the soil without over watering and causing the soil to become weak and waterlogged.
Once the root ball as well as the soil around the tree have been thoroughly watered, spread a 4-inch thick layer of mulch around it. Keeping the mulch approximately 4 inches away from the trunk, spread in diameter equal to the widest part of its branching. This will keep the soil around the tree both damp and warm, as well as providing a basin for watering the tree later on.
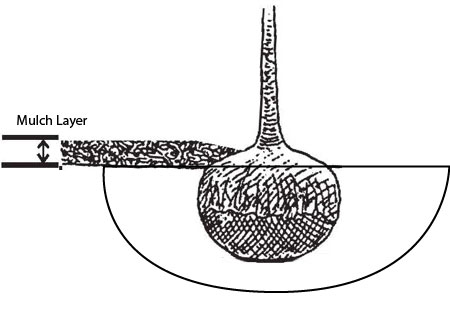
Mulch Diagram
Step 7
Be sure to follow any instructions regarding the planting, watering, and care of your tree, you do not need to fertilize the tree when it is planted. It is better to wait and fertilize the tree when spring arrives or when it is recommended to do so via the tree’s care instructions. It may be good to prune away any dead or damaged branches at the time of planting, but it is not a good idea to prune anything else until new growth begins to emerge or when it is recommended in the tree’s care instructions.
For a happy, healthy, long-living tree follow the tree’s care instructions. If you have any questions about the tree or it’s care instructions, contact the nursery where you purchased the tree or your landscaper for help.
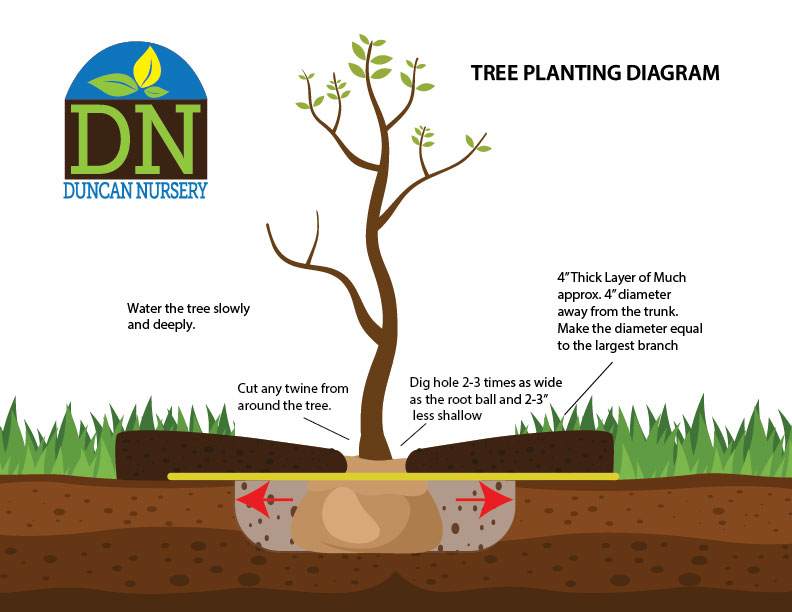
Diagram for planting a new tree
Recent Comments